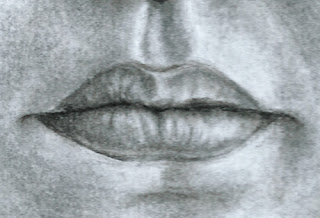
 Learn how to draw a mouth step-by-step in charcoal, for beginners too!
A person's mouth can be very characteristic. It is something that is used to speak and show expressions. A mouth can be a very easy thing to draw or a very hard thing to draw. In this tutorial I will show you my approach on how to draw a mouth.
 Step 1: Draw the lip parting line
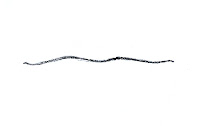
You can start of with willow charcoal, which is a bit softer and more forgiving if you make mistakes. I started with compressed charcoal because I am going to make this line darker later on. The first thing I draw when I draw a mouth is the line that parts the two lips. This will just give you a basic indication for the width of the mouth. You can shape and draw the rest of the lines around it. This line should be a bit squiggly. No ones parting line is completely straight. Note that in the corners of any mouth, the line will either go a little up or a slight curve down. In this case the corners of the mouth I am drawing is curving slightly up and then down.
 Step 2: Draw the shape of the mouth
The next thing I do when drawing a mouth is to draw the shape of the upper and the lower lip. The lower lip is most of the times a bit thicker than the upper lip. The upper lip forms a wide 'M'. The little 'v' is in the middle of the mouth and the legs of the 'M' come down close to the corners faster than the bottom lip. In other words the lower lip should be a bit wider than the upper lip. Don't make these lines too dark because you don't want a too dark lip-line later on.
 Step 3: Add the basic shading
Use willow charcoal and give both the upper and lower lip a basic tone. You can then use a smudge tool to soften the appearance and for a more natural texture. Depending on your light source, the upper lip might be a bit darker if the light is from above the subject. The area close to the mouth opening can be a bit darker because less light reaches this area. It is important to remember that the mouth is not flat and still takes up volume. So try to point out the areas where the light reaches the most and where it reaches less. The areas where it reaches less will fall back in the drawing and the areas where it reaches most should pop out of the drawing.

 Step 4: Drawing in some highlights with an eraser
Use a rubber eraser to get sharp highlights and a putty eraser to make certain areas lighter with a more gentle touch. This should already add some detail to the drawing. Do this step before you add darker tones and detail.Step 5: Add more detail with a sharp willow
Use some sharp willow charcoal to add more detail on the places you want to add detail lines with charcoal later. This is also the step where you add enough willow to create volume on the lips.
 Step 6: Smudge some of the willow and add detail with a compressed charcoal
This is the final step an d this is when you add detail with a sharp compressed charcoal. Use a smudge tool to smudge some of the willow charcoal from the previous step. Make the line between the lips darker to create the illusion of the lips being able to sepperate. Then use a very sharp compressed charcoal to add light lines. This will give the mouth some texture. Use an eraser or putty eraser where necessary to add highlights. And you are done!I hope you enjoyed this tutorial and that you will impliment some of these tips and techniques in your drawings.
No comments:
Post a Comment