Tuesday 30 April 2013

Draw using negative shapes

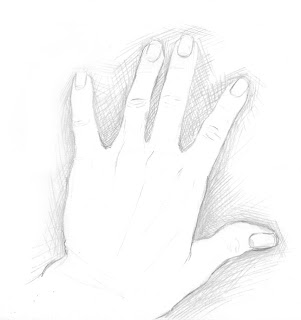
line drawing of hand
The hand is positive space and the rest negative space


Looking at the negative spaces

In this section I will explain to you why learning how to draw with negative spaces are very important to your drawing. 

An object is an example of a positive space, in other words it is a solid.  The spaces between your objects and all the solids can create very interesting negative shapes and this is called the negative space of your drawing.

Negative spaces play an important role in your drawing because they enable you to check how accurate your drawing is.  They also contribute to your composition.  When you make a compositional drawing you will see that negative spaces play a very important role to the space in your drawing.  The more unique your negative spaces are, the more interesting your drawing will become. 

How to prepare good negative spaces for your drawing

In a figure drawing, it is important for your model to give you enough negative space to make the drawing interesting.  This can be achieved for example, by the model standing with one leg straight and the other bent and with one hand holding a pole and the other hand on the hip. All these negative spaces create interesting lines on your figure and makes the audience want to explore the drawing.  If there is little negative space, for example the model stands with their arms next to their side and legs next to each other, the drawing can become boring or feel uncomfortable. 

The role of negative spaces in a composition

Negative spaces can be used in a composition to get balance in a drawing.  The rule is to usually have an even number of positive and negative spaces.  The negative can be a tool to create a certain mood in a drawing.  A busy drawing with little negative space and a lot of positive space can be over crowded but this might be your intent.  This can draw more attention to the positive space.  A drawing with less positive space and more negative space can feel empty and lonely.  It is up to you to decide how your drawing feels.  It is important to choose your balance just right for your subject matter and the style of your drawing.

How to test the forms in your drawing with negative space

When you put three balls next to each other to form a little triangle you get a funny triangle negative space.  When one of the three sides of the negative space  triangle is not correct and the triangle is misshapen, you know that one of the three balls is drawn wrong.  This is a way in which we can use negative spaces to test whether we have drawn our forms correctly.  If the triangle is right, you know that your forms are also right. 

Negative space is very useful in a drawing and I use it a lot in deciding how to place my objects.  It helps me to decide whether a certain object will look interesting or not in a drawing.  I also look at the relation and proportion of the negative space lines to help shape my positive space.  Negative space is a great tool that every artist should learn to look at before, during and after a drawing.

How to draw with perspective

Mastering One point and Two point Perspective

Perspective in drawing
Figure 1

I am going to discuss the use of one-point and two-point perspective in drawings and how you can effectively pull of a perspective drawing with absolute ease.  

In art we commonly use one, two and three point perspective but I will only discuss the first two and at a later stage I will introduce three-point perspective.  The first requirement in perspective is that there must always be a horizon line.  All your perspective points should always meet the horizon line.  In one-point perspective there is only one perspective point on that line while in two-point perspective there will be two perspective points on the horizon line (see figure 1).

When it comes to perspective in a drawing there are three main aspects that should be considered.  

First is how the size of an object seems to diminish as it moves further away from the human eye and closer to the horizon line.  

The second thing is how aerial perspective comes to play.  Aerial perspective is the impact of atmospheric light on an object as it moves further away from the eye.  For example, when you are close to mountains you can see the beautiful brown colors of the ground and greens on wild flora but as you move further and further away from them, the mountains become almost blue.  That blue is the atmospheric light or the aerial perspective.

The third thing is that objects that are further away from you or closer to the vanishing point don't need as much detail as the objects closer to you.  Your eye naturally sees less detail the further away it is from an object.  This concept can be used in drawings as well.  You can spend more time on the foreground and add more detail to emphasize that is closer to you.  You can also use warmer colors in your foreground and cooler colors in your background.  This will make the foreground pop forward.

How to get the angle right

Getting perspective right can often just mean that you need to get the angles right.  You can make an easy angle measuring tool by cutting two strips of paper out of stiff cardboard about 4 x 20 cm and fix them together with a paper fastener.  Make sure these strips can still easily move so you can manipulate the angles at which it opens.  

Hold your new measuring tool up in the air as if you are holding it against glass and open it until it is displaying the correct angles like you see in front of you.  Take the angle measurement tool and put it against your drawing surface and copy its lines.  You can measure all your angles like this and so get a very accurate perspective drawing.  

A perspective drawing can be above eye level or below eye level.  When the subject is below the horizon line it is below eye level as if you are looking down at it (in Figure 1, both drawings are above eye level).  When the subject is above eye level, the drawing is draw from above eye level as if you are looking up at it.

Perspective is an easy concept to grasp.  You can see perspective in almost any drawing and is very useful knowledge to have. 
View page

Monday 29 April 2013

Learn to draw using texture

Use texture to create amazing realism in artworks

Every object has a texture.  

Water has a smooth, shiny and reflective texture while grass has a rough and pointy texture.  You can experiment with different lines to create interesting looking textures.  Short scribble lines can be used to create the texture on a tennis ball while longer curvy lines can be used for curly human hair.  Texture is a great way to express yourself.

Charcoal drawing of nutsTexture is a provider of vital information of a drawing's characteristics and surface detail.  I can indicate whether an object's surface is smooth, rough, jagged or shiny.  When you draw a composition with different objects, you should take texture into consideration.  To create a visually appealing composition of say three objects, use three different textured objects instead of using objects with similar textures.  For example instead of making a composition out of a glass window, glass of water and shiny ball, use a glass of water, textured material bag and some organic seeds or some shells.  

Use different mediums and varied lines to create texture

Don't be afraid to let go a bit and experiment with different mediums like charcoal, ink, pencil, different papers and so on.  As you experiment, you will learn what works and what doesn't.   You can also use different types of lines to create visually stimulating texture.  Vary the thickness of your line and relax your hand for for the best results.  You can experiment with sharp and blunt pencils.  You can also hold the tip of the pencil flat against the paper, pressing hard and soft to get different styles.

Frottage

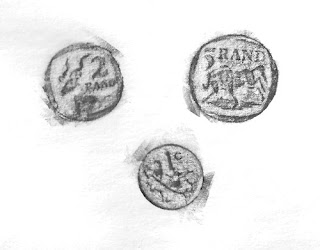
coinsYou remember when you were a child and you use to take coins and put a paper over it and then use the flat side of your pencil and rub it over the paper.  What you were then left with was a impression of the coin.  Well that is called frottage.  Frottage is a French term and it means to take an impression by rubbing.  Many artist in the twentieth century used this technique, like Max Ernst.  If you have an open mind towards your materials used in your drawings, this is an easy way you can add texture to your drawing.  You can make an impression of wood with beautiful grains and use it in a drawing as a table surface.  You can do the same with different leaves and then combine them and use them as trees in a forest   The possibilities are endless.  Charcoal is a great medium to combine with frottage.

An important thing to remember when you apply texture to a drawing is that all the other drawing elements still apply.  You must still spend time on your shape and line and also remember that you must still apply tonal value and show volume.  When most beginner apply texture they sometimes spend so much time on their texture and then it is amazing but they completely neglected the rest of the elements and then the drawing is still lacking.  

I can promise that if you add texture to your drawing while still applying all the different drawing elements, you will amaze yourself and leave others awe-struck.  It is a smart trick to making your drawing look like a master piece, if used correctly.

View page

Learn to draw using volume

Mimic reality with volume

Volume and value go hand in hand together.  Value is used in different tones to create volume in and artwork.

The most troublesome thing for most beginners is where the cast shadow goes when a light is show on an object.  If it is used correctly it can be an indication of distance from another form.  A cast shadow can be an indication of where the light source is coming from and can help with compositional and expressive functions in the artwork. 

Volume is the space or environment of a form or object in a drawing.  It involves to creating the illusion of a 3D object on a 2D surface.  To draw realistically, you need to incorporate tonal values in your drawing.  You can transform the shapes in your drawing to 3D using shading and contrast.  For example a circle can be transformed into a sphere.

There are three ways in which you can add volume to your drawing:

1.  Tonal value and shading

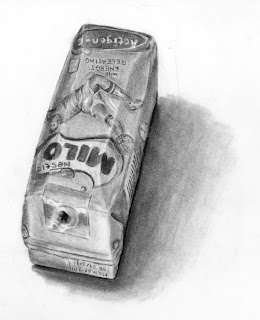
Charcoal sketch of milo boxTonal value or shading can be used in a drawing to mimic realism.  It is important to use light and dark tones when you are shading and to use some contrast.  I have said this in other parts of my blog, but it is important to ensure that you have a sufficient light source.  Without good light, you won't be able to see all the detail that you need to and might struggle getting your shading to look good.  You will be able to see all the lines you need to and also you will be able to pin point the light and dark tones for your drawing.

2.  Use of directional lines when shading

A directional line is the direction in which the object's natural curves go.  When shading, it is essential to follow these natural lines of the object.  If the object is round, your directional line is round.  If the object is square with flat sides, the directional lines will be straight.  The reasons for shading along with these natural lines are because they help the eye to make sense of the objects in your drawing.  When a circle is shaded with curving lines, it is automatically recognized by the human eye as a drawing of a sphere or a ball.

3.  Pay attention to the cast shadow of the object

The cast shadow is created when something solid like an object is placed between a light source and a surface.  The closer the object to the surface, the more defined and the darker the cast shadow.  As the object moves further away from the surface, the shadow becomes blurry and slightly lighter in tone.

Volume is very important in a drawing and it should always get some extra attention from you.  It can mean the difference between an OK drawing and an amazing drawing. 

If you would like to learn more about volume in a drawing and how composition can also imply volume, read more about it here.
or 
If you would like to learn more about how to draw with tonal value and shading and using it to imply volume, you can read it here.

View page 

Learn to draw using value

ball drawingValue

Value is the different tones of color (from white to dark) in an artwork.  

It can be created in two different ways.  The one way using various hatched lines over and over each other that result in a dense mass of lines and so creating different shades of grey.  The other way is by deposits of actual grey tones created by chalk, pencil, diluted ink or paint washes.  An object will always have a lightest value, middle value, a dark - and a darkest value.

Value can contribute to the mood of your drawing and can suggest a broad range of expression.  How you contrast, shape and distribute your values and how the values are arranged can contribute to the psychological mood of the drawing.

Value draws attention to the weight, importance or the direction of a form.  It is a very versatile compositional tool and its use in a drawing is crucial for allowing a viewer to make sense of a form or objects.  It creates a visual diversity and acts as a strong unifying agent.

Most beginners are scared of using dark values and are afraid that once it is dark that it can't be removed.  They limit themselves to using line and rather to experiment with different types of lines than different values.  Drawing with line is excellent but if values are always dodged because of fear of using dark values, it is a shame.  If you are afraid of making mistakes like drawing to dark, start light and use layers and layers until the right dark and light contrasted values are achieved.  But I can't stress enough about how important contrast is.  My art lecturer always use to say, I want to see black and white and grey, not just grey.
Ball with matches
Elements of light

Elements of light

If you are drawing a red apple, you see red and your first reaction is to make the whole drawing grey and maybe add dark tones to create some value.  I can tell you that every object, if it has a solid light source, will always have some white in it.

Every objects has a few elements that one should learn to spot and implement in ones drawings.

1.  Lightest value
2.  Second lightest value
3.  Third lightest value
4.  Darkest value
5.  Reflective light
6.  Cast shadow

The cast shadow is sometimes troublesome for many artists.  It is an important element in your drawing and must not be forgotten.  It has many functions in a drawing.  It can suggest the location of the light source, the distance of the object in relation to the ground, wall or other objects and it can have expressive functions.  

Do your own study on light versus the cast shadow.  Take one object and do different sketches of it, each time with the light source from a different angle or just move the object around while the light source stays the same.  Feel free to send your images to me for some feedback :-) 

View page

Learn to draw using line

Line

Drawing of hand and toyLines in drawing are the most basic element that is needed to create a shape, volume, tonal value or texture.  Every beginner should learn how to draw with different lines and master the technique of line drawing early.  It will make a big impact on the quality in their future work.

Lines have the ability to explore, express and act.  They are used to communicate information of a visual nature to a viewer.  You can learn how to draw with different types of lines that can help you communicate different things.  They can help you express your drawing exactly the way you want to.

A line has certain properties that are a given.  A line divides the picture-plane and always has direction.  It has somewhere along its course, one or more values and is either consistent or varies in width.  Lastly a line is always a certain length.  

A line is a very versatile thing.  To create a shape you have to use an outline and contour lines (There are also blind contour lines, which are achieved through looking only at the object while redrawing it and not looking at the paper while drawing).  You know when you place your hand on a paper and you start tracing all around it?  That is a form of an outline.  But in order to create a detailed drawing, you will need to draw the contour lines.  These contour lines are the nails, fold lines and so forth on your hand.  Once you have a drawing with an outline and some contour lines, you have a line sketch.  

But drawing with line does not just stop at outlines and contour lines.  Did you know that master artists use different types of lines in their drawings to create mood in their drawings and express their work in certain ways.  There are several different types of lines one can use in a drawing, like the diagrammatic line, structural line, calligraphic - and expressive line.   

1.  The diagrammatic line

The diagrammatic line is analytical and investigative.  It clarifies the experience of spatial depth, dimension, shape, direction and structural nature of forms in space.  These lines can measure distance, determine scale, move through forms and space and also show the environment in which the forms, subjects or objects are found.  This is a line often used to connect forms in space and a fusion between form and space activates rhythm, energy and and activity to your drawing.

2.  The structural line

The structural line is very similar to the diagrammatic line but it still differs in some ways.  It is focused on explaining volume to the audience through defining the directions and the shape that makes up a form. 

3.  The calligraphic line

Calligraphic lines have strong rhythmic values and also have a powerful gestural line nature.  They are versatile and one can play around with this line.  They can bring to mind certain qualities of the subject to give a description thereof.  A calligraphic line has a relational purpose and a expressive power.

4.  The expressive line

Every line has some expressive qualities, which leave a certain mark.  Every artist has a different aesthetic attitude towards lines and so they express their work in different ways.  How they use this line can contribute to a certain feeling or mood in a drawing.  Lines are regarded as expressive when the artist's use of line has no other motive in his drawing than that of conveying his feelings or mood.

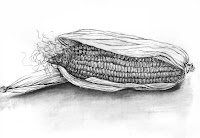
drawing of cornLines can bring an aesthetic beauty to your artwork.  You should not limit yourself to thinking you should always add tonal value in your whole drawing.  You can use a combination of line and tonal value or only line.  Line is a very important element in a drawing and as you play around with it more, you will come to love it.

View page

Learn to draw using shape

Shapes in your drawing

In my opinion, the most important thing an artist needs to master first while learning to draw, is the shape of an object.  

A shape can be any flat area that is bound by tonal value, line or both.  A drawings complexity is determined by all its various components that defines its shape.  The shape is also one of the elements that helps the audience to make sense of what you are drawing. 
 
It is extremely important to spend more time on your shape before you advance to shading your object.  There are two different types of shapes namely organic and geometric.  Organic shapes are any shape that is irregular and they tend to echo the contours of nature.  Geometric shapes are more structural.
Drawing of a vegetable in ink
Organic object

Organic shapes

The use of evenly curved or a lot of straight lines are very little or even absent in organic shapes.  They are gentler than geometric shapes.  Examples of organic shapes are fruit, seeds, trees etc.
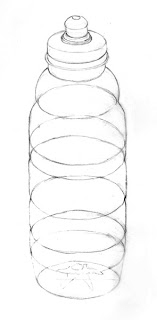
Line drawing of bottle
Geometric shape

Geometric shapes

As the term implies, a geometric shape can be a square, circle, triangle and so on or it can be a combination of the curved or angular boundaries of a geometric shape.  Examples of geometric shapes are bridges, houses, chairs etc.

Shapes can be big or small, hard-edged or vaguely edged; they can be active, passive, stable, negative or positive.  A shape can be consistent or irregular in its properties.  When you want to draw an object, you will need to interpret the shapes of which it consists out of.  You can squint your eyes to help obscure the detail of the object and its background.  This allows you to spot the shapes much easier.  To interpret a shape, you must begin to avoid placing all the attention on the subject as a mass in space.

Getting your shape right

If you are drawing a strawberry but it looks like an orange then the audience are going to interpret it as an orange.  This is due to lack of spending time on your shape.  Shape recognition is important.  If a drawing is in silhouette, one should be able to recognize what it is.

Study the object you want to draw and imagine drawing it.  I always imagine how I am going to draw an object before I even choose to draw it.  I study its qualities and classify it as organic or geometric.  I then look at the basic shapes it consists out of like circles, rectangles and so forth.  I then study the proportions and relations of these shapes to one another.  I will then start drawing my object by starting with those basic shapes and then when I am satisfied with those shapes, I start adding details.

It is important not to neglect your shape and to spend the necessary time on it.  A shape is an essential part to mimicking reality and it would be a pity if you neglected it and spent so much time on the other elements but your shape is lacking.

Learn to draw: Introduction to the drawing elements

Drawing elements

Knowing the drawing elements will make your life as an artist so much easier.  It is smart to learn all about them before tackling a project.

Everyone has an artist inside of him or her.  My art lecturer always said that it takes 10% talent and 90% practise when it comes to drawing.  I have seen my fellow students grow by just getting the right tutoring and advice.  I believe that every one can draw if they believe in themselves.  I have learnt that there are a few tricks that every starting artist needs to know to become a master in drawing.  The thing about drawing is that it is all in the hand-eye co-ordination.  Once you master that, nothing can stop you.

The most important elements to learn about before you start a drawing is the shape, line, value, volume and texture.  

Shape

In my opinion, the most important thing an artist needs to master first while learning to draw, is the shape of an object.  It is extremely important to spend more time on your shape before you advance to shading your object.  There are two different types of shapes namely organic and geometric.  Organic shapes are any shape that is irregular and they tend to echo the contours of nature.

Line

There are several different lines one can use like the diagrammatic line, structural line, calligraphic - and expressive line.  A line has certain properties that are a given.  A line divides the picture-plane and always has direction.  It has somewhere along its course one or more values is either consistent or varies in width.  Lastly a line is always a certain length.  
Drawing of a ball
In this image one can clearly see the different tonal values.

Value

Value is the different tones of color (from white to dark) in an artwork.  It can be created in two different ways.  The one way using various hatched lines over and over each other that result in a dense mass of lines and so creating different shades of grey.  The other way is by deposits of actual grey tones created by chalk, pencil, diluted ink or paint washes.  An object will always have a lightest value, middle value, dark - and a darkest value.

Volume

Volume and value go hand in hand together.  Value is used in different tones to create volume in and artwork.  The most troublesome thing for most beginners is where the cast shadow goes when a light is show on an object.  If it is used correctly it can be an indication of distance from another form.  A cast shadow can be an indication of where the light source is coming from and can help with compositional and expressive functions in the artwork.

Texture

Every object has a texture.  Water has a smooth, shiny and reflective texture while grass has a rough and pointy texture.  You can experiment with different lines to create interesting looking textures.  Short scribble lines can be used to create the texture on a tennis ball while longer curvy lines can be used for curly human hair.  Texture is a great way to express yourself.

In a nutshell, if you can master all the elements of drawing; shape, line, value, volume and texture together you will be able to create masterpieces that you will love creating and others will enjoy viewing. 

View page