 Learn how to draw a nose
In this tutorial, is my approach to drawing noses and I find it to work great for me. I hope you can use some of these tips when you draw noses in your drawings.
In this tutorial I will teach you how to
draw a nose. I always use to dread
drawing the nose and postpone it while I was drawing. I use to struggle with getting it to look right
and I use to struggle to get it to look like it is 3D. I have practiced it a lot since and have
studied noses a lot because I wanted to like drawing noses and not hate it.
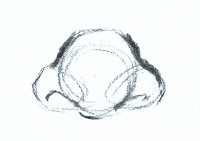
 Step 1: Basic shapes of the nose
I usually start with the basics of the nose
by drawing the geometric shapes it consists out of. The most basic shape of the nose is a circle
with two little circles on both sides. I
prefer drawing those small circles on the side of the nose a little bit
triangular. This will help me later on
when I draw detail.
 Step 2:
Draw the shape of the nose and the nostrils.
I draw a bit more detail over my basic
shapes by creating the outline. I draw the
nostrils in both those small triangular circles. Take note that nostrils are not completely
half circles but have a little bit of a triangular shape.


Step 3: Start adding a base color or value
I start adding some base values. I add some basic shading to the areas I want
to fall back more. I leave other areas
white that I want to come forward out of the drawing. This will create some illusion of depth.
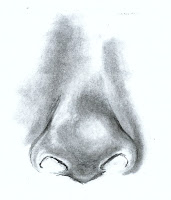
 Step 4:
Continue adding shading
I continue to add some shading in layers
until I am satisfied. I use and eraser
or putty eraser to erase areas I accidentally made a bit to dark and to add
highlights. I have also made some
mistakes here and there and I also fix them with the putty eraser. I use some compressed charcoal to add those
darker lines around the nose and then ad some more shading with the
willow. Pay attention to your light
source to see where the light hits the nose and where not.
 Step 5:
Shading the nostrils and adding detail.
Now that I have my shading almost done, I
can start with some extra detail. I use
my compressed charcoal and a little bit willow charcoal for the nostrils. The nostrils are very easy to add detail to. It is a hole and falls back the most so it
should be darker than most of the shades currently in the drawing.
So this is how I draw my noses. I hope you like it and that you learnt
something new.
No comments:
Post a Comment